Productivity Mac OS setup for PHP development (Laravel, with Laravel Boost) using the Zed editor
This article is all about how I like to set up my environment for PHP development from scratch. These are just my personal preferences, but hey, try a few out and you might end up liking them too.
Overview
Here's a list of topic we're gonna cover today, so pick what you're most interested in.
- Brief hardware overview
- Mac OS setup, application and packages
- Productivity apps and setup
- Development environment setup
- Editor setup
Hardware
My daily driver is a 14" MacBook Pro M4, usually hooked up to a 27" Dell U2719D monitor. For typing, I use the Lemokey L3, and for pointing at stuff angrily I use the Logitech G900. Since working in total silence feels like a horror movie, I always have music playing—usually through my Sony WH-1000XM5s.
The MacBook is also plugged into a Scarlett 2i2 audio interface (sometimes for recording guitar, more often just looking cool), and my Audio Engine HD3 speakers run through it too.
Basically, lots of cables.
Mac OS setup
Normally I have everything automated in my dotfiles, but just for the sake of this article I’ll walk you through how I set things up—keyboard shortcuts, workflows, app switching, all that jazz.
If you’re curious, my dotfiles live on GitHub.
Most apps, libraries, fonts, and packages are installed with Homebrew, so make sure you’ve got that.
Applications
My must-have apps (aka: “if they broke, I’d cry”):
- Raycast — Swiss Army knife for the Mac
- Flashspace - because macOS Spaces are… let’s be polite and say not great
- Ghostty - as my main terminal emulator
- Github Desktop - GUI for when I don’t feel like being a terminal wizard
- Herd - Laravel dev environment
- Ice - hides menubar icons (because clutter makes me itchy)
- Karabiner Elements - keyboard remapping magic
- TablePlus - database wrangling
- Zed - current editor
- Zen/Chrome - Zen for casual browsing, Chrome for dev. Keeps my tabs from fighting each other
There are more, but let’s stick to the productivity/dev stuff for now.
Karabiner Elements
First of all we need the "hyper key". I know you can do that in Raycast, but I had it for a while in Karabiner along with some other bindings, so I'm keeping it there. So I bound my caps-lock key to fire off cmd+ctrl+shift+option when held down, but when you just press it, it triggers escape (very usefull for vim mode).
This is how this looks like:
{
    "manipulators": [
        {
            "description": "Hyperkey",
            "from": {
                "key_code": "caps_lock",
                "modifiers": { "optional": ["any"] }
            },
            "to": [
                {
                    "key_code": "left_shift",
                    "modifiers": ["left_command", "left_control", "left_option"]
                }
            ],
            "to_if_alone": [{ "key_code": "escape" }],
            "type": "basic"
        }
    ]
}
Raycast
Raycast is like a command center for my Mac. I use it for window management, app switching, emojis (very important), docs search, clipboard history, and more. Pro tip: I’m still on the free version.
The magic sauce is the “hyper key”—a single key that fires off cmd+ctrl+shift+option all at once. I bound it to caps lock (finally, caps lock has a purpose). From now on I’ll refer to it as ✦.
So let's go into some of my Raycast settings.
For example:
- ✦+arrow keys = tile windows
- ✦+enter = maximize
- ✦+space = center the window
Switching and launching apps with Raycast is where the real magic happens. Sure, you could hit your hotkey, type the app name, hit enter… but who has time for all that? (That’s like walking when you know there’s a skateboard leaning against the wall.)
Instead, I bind my most-used apps to direct shortcuts. Think of it as muscle memory meets productivity hacking. If you’ve ever messed around with Omarchy by DDH, the concept is pretty similar—you press a key combo, and boom, the app’s in your face before your brain even finishes the thought.
Here’s how my bindings look:
- ✦ + a - browser (Zen; closest to caps lock, so my pinky doesn’t have to do yoga 😉)
- ✦ + e - editor (Zed)
- ✦ + t - terminal (Ghostty)
- ✦ + g - git (Github desktop)
- ✦ + c - Chrome
- ✦ + l - Linear
- ✦ + n - Notion
- ✦ + m - Mail
- ✦ + s - Slack
- ✦ + x - Spotify
- ✦ + d - TablePlus (database stuff)
Basically, it’s like I gave my caps lock key superpowers, and now it opens wormholes to whichever app I want.
I do have a bunch more, but these are the most commonly used.
And that’s just scratching the surface. With extensions, Raycast can do a lot. If you’re still on Alfred, you might wanna give this a spin.
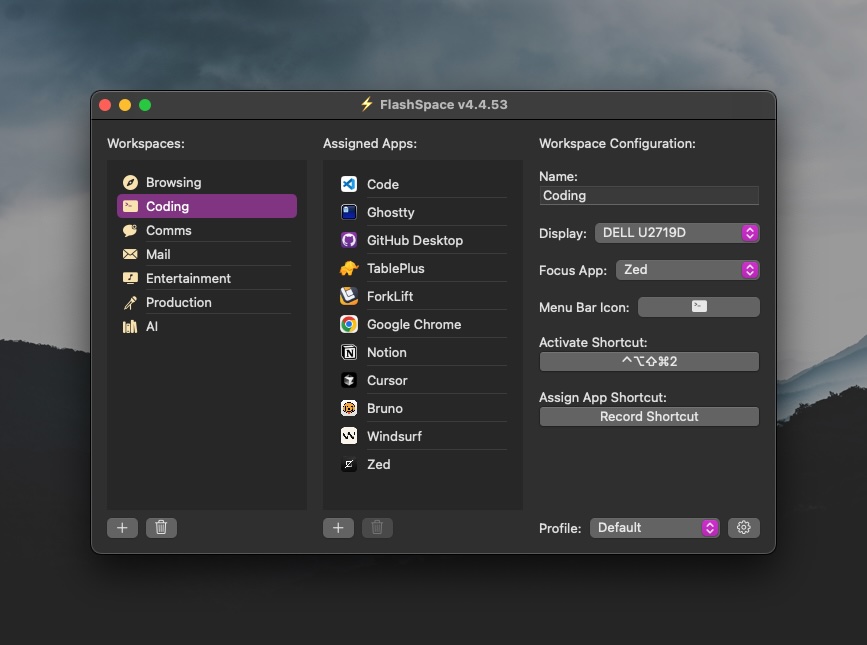
Flashspace
macOS Spaces are… let’s just say, not their strongest feature. Slow animations, little customization. Enter Flashspace.
It lets me set up multiple spaces, name them, add icons, and bind shortcuts. Most importantly—it’s instant. No laggy animations. Just ✦+1/2/3/etc and I’m jumping between fully configured workspaces.
Ghostty
Ghostty is my terminal emulator of choice. It’s fast, customizable, and—let’s be honest—the icon is great.
I use zsh (default on macOS) with Starship for a slick prompt. I used to run oh-my-zsh but it started dragging its feet. Oh, and don’t forget to install a nerd font for proper icons.
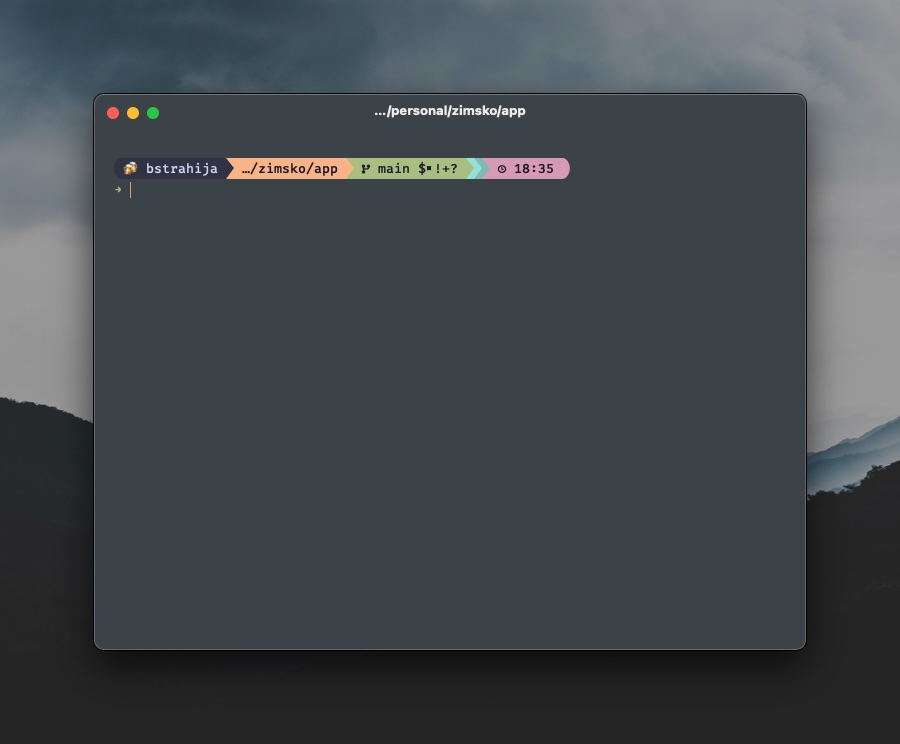
Theme of the month: Everforest. I rotate fonts/themes every 2–3 months just to keep things fresh.
Here are some CLI tools I can’t live without:
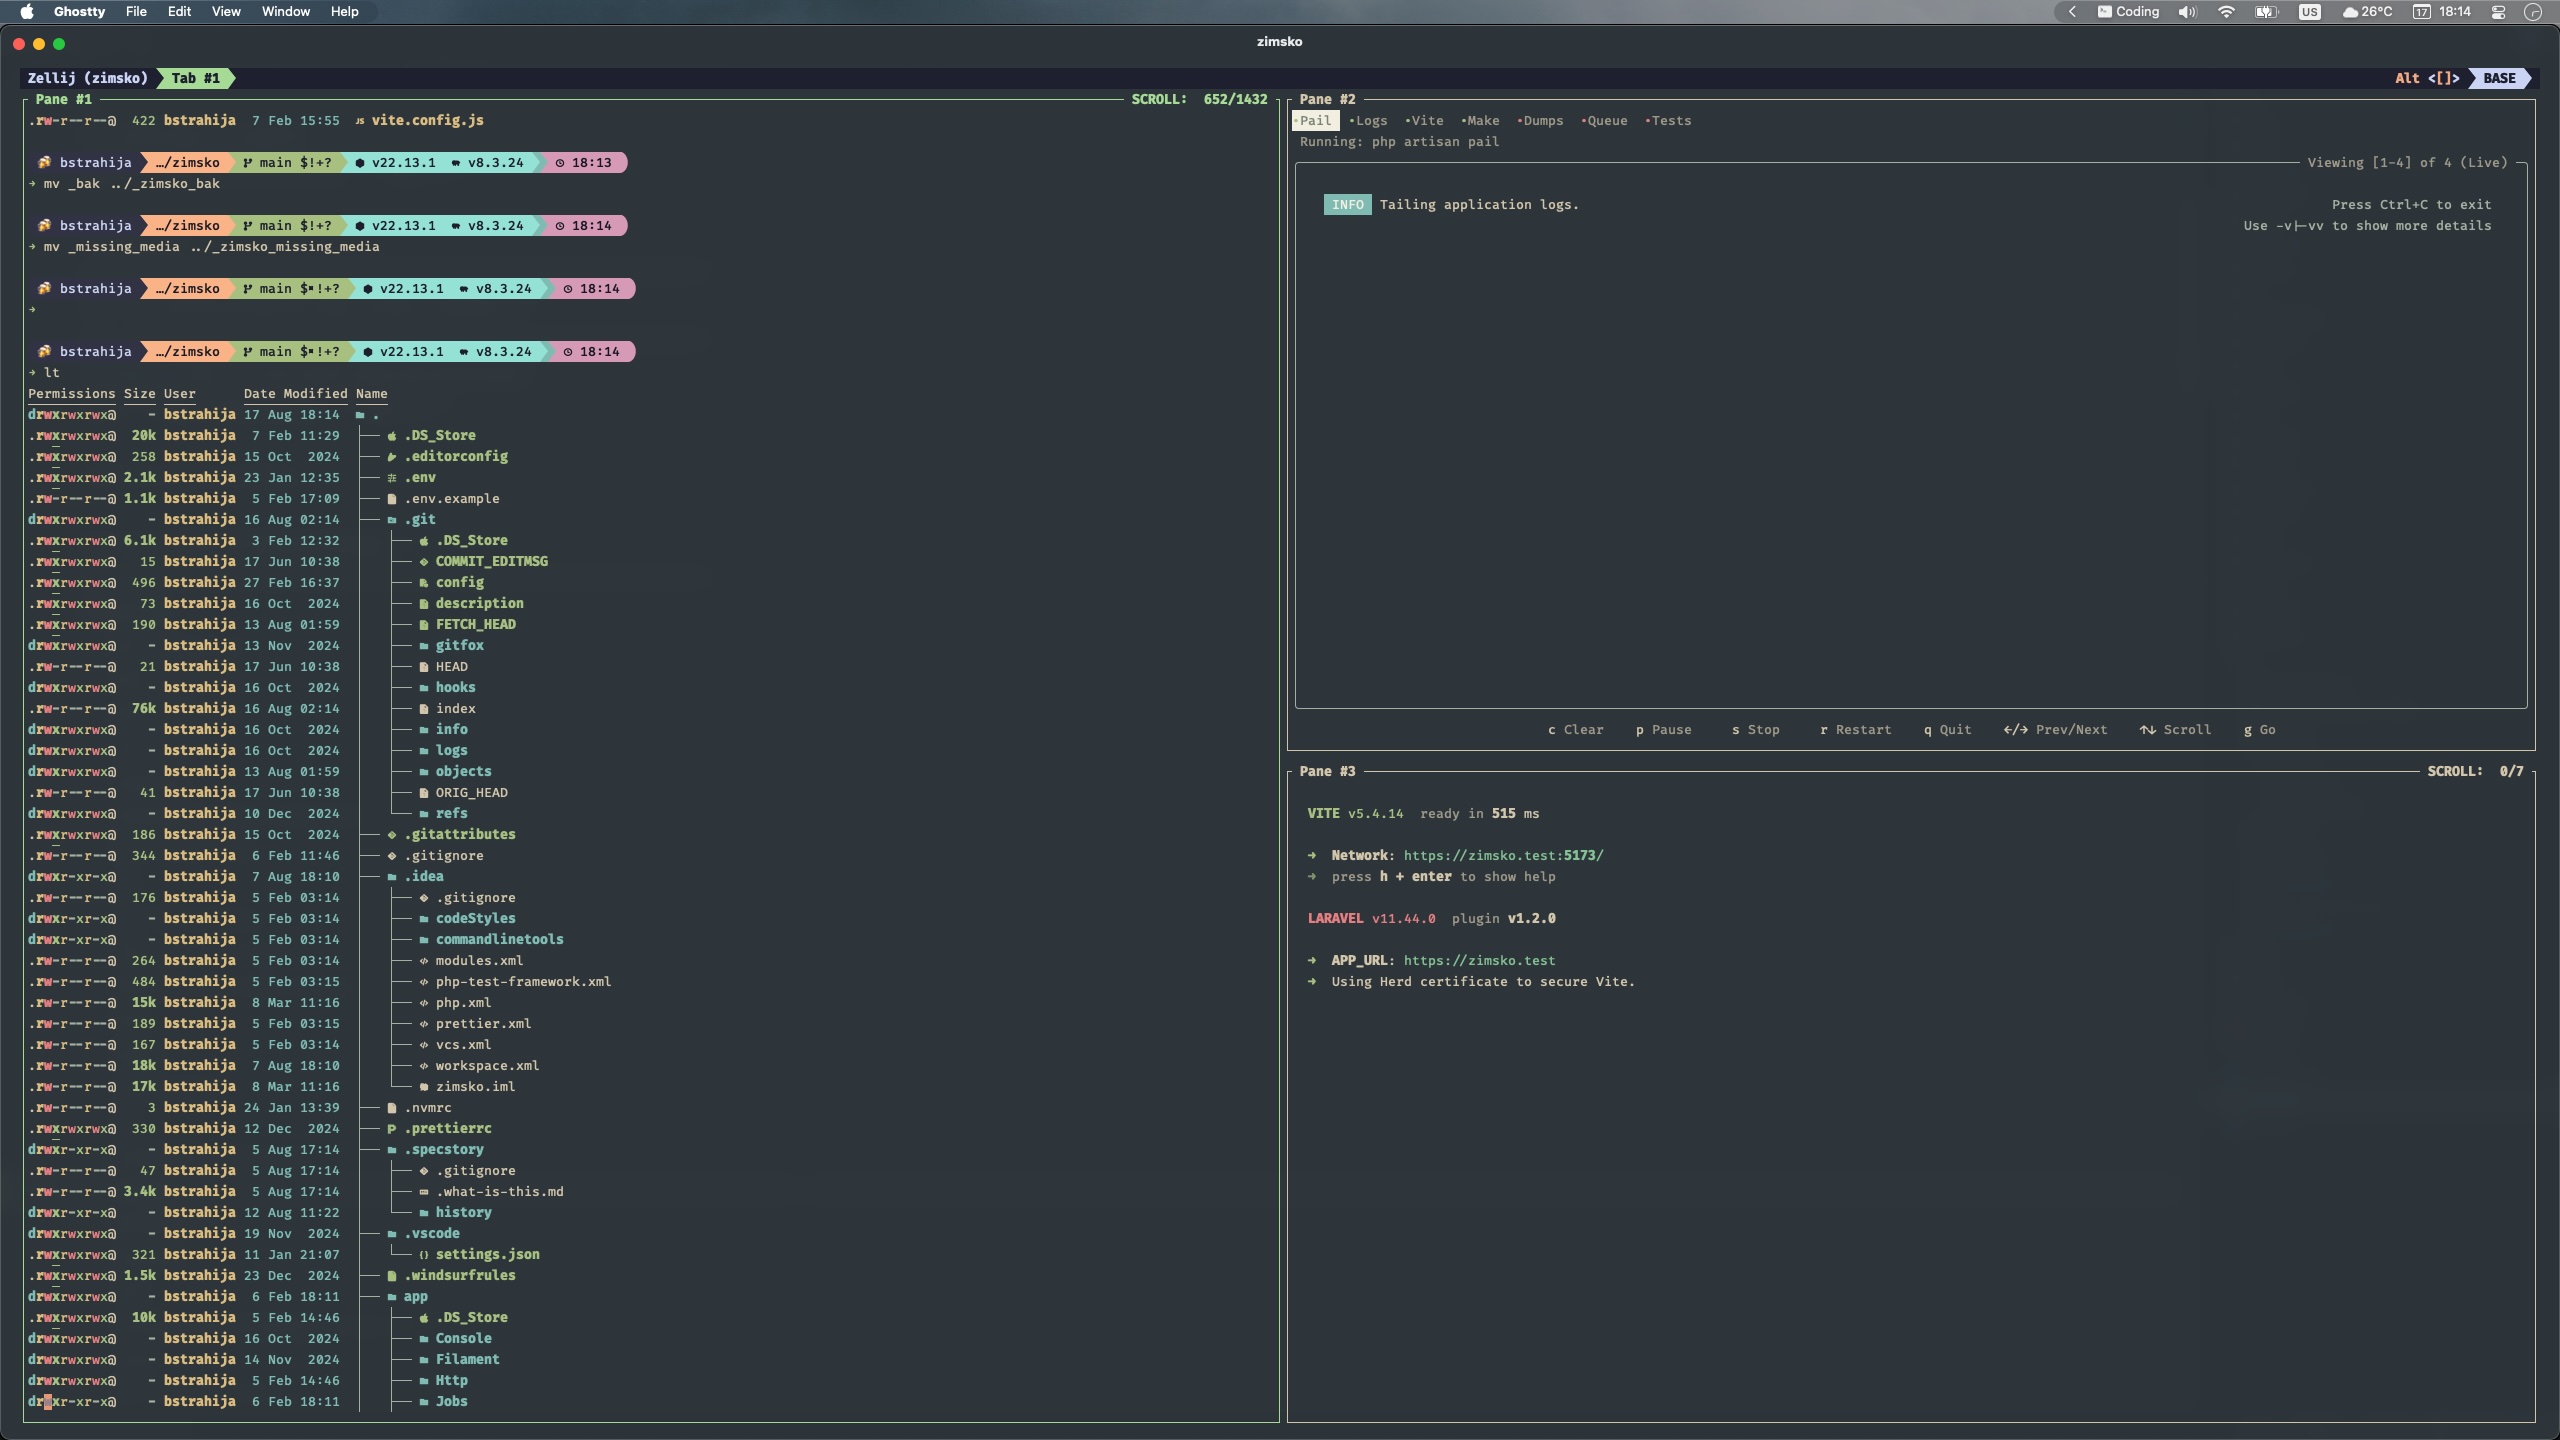
zellij
I used tmux for a while, but zellij is more user-friendly. If you’ve never heard of them: they’re terminal multiplexers. Think split panes/tabs, but inside any terminal.
I use it to keep sessions running, switch between projects, open panes, and keep long-running commands alive.
zoxide
Zoxide is cd on steroids. It learns your directory habits and lets you jump around with partial matches.
Let's say you have a Laravel project inside ~/Code/personal/my-awesome-laravel-project and you wanna jump into that directory, you can just type the following from anywhere in your terminal:
cd awesome-laravel
Or you wanna go to the migrations:
cd awesome migrations
As long as you’ve been there before, it’ll find it. Honestly, I couldn’t work without it now.
eza
eza replaces ls and makes directory listings… not boring. It supports icons (with nerd fonts) and tree views that actually look good.
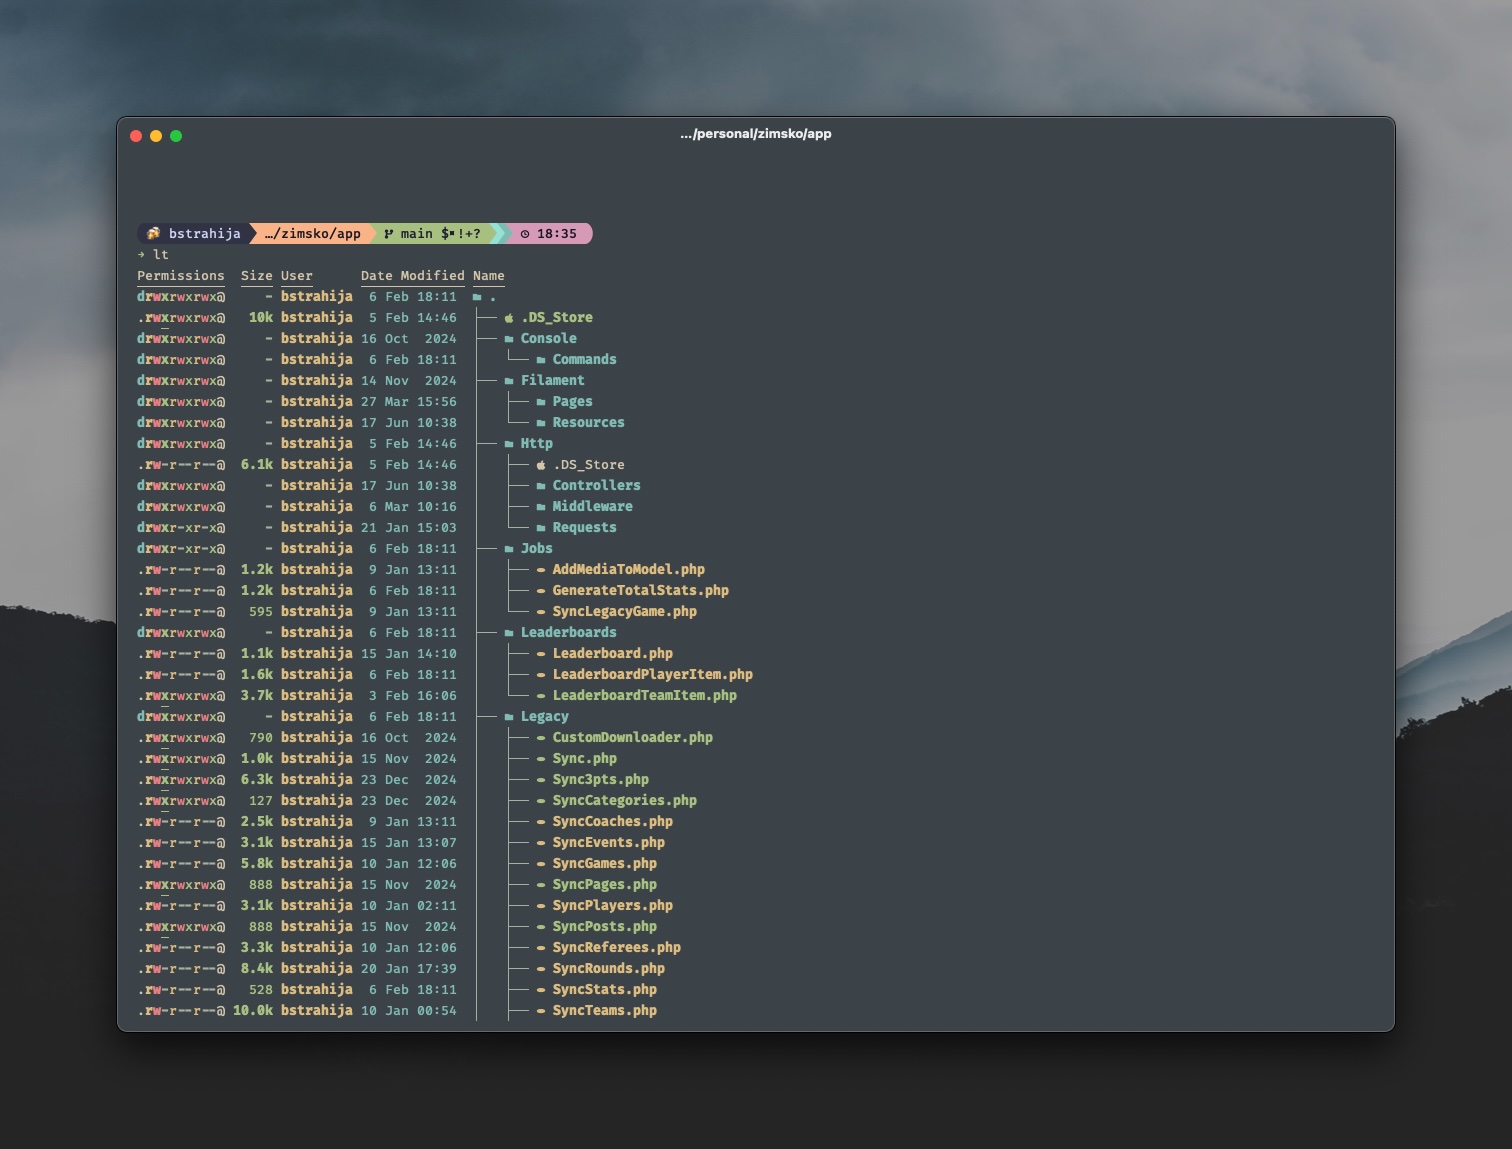
Keep in mind you need to have nerd font installed to display the icons in the list.
Other tools worth mentioning
And here are some others I use:
- atuin - smarter shell history
- bat - cat, but cuter
- fastfetch - system info flex
- fzf - fuzzy finder supreme
- mailpit - must have for testing email
- prettyping - because life’s too short for ugly pings
- ripgrep - better grep
- speedtest-cli - internet speed test for the cli
- xh - alternative to curl
Zed Code Editor
After months of VS Code (and trying Vim motions inside it), it just felt… sluggish. I wrote about my setup in this article. I did share some tips and my settings for VS Code that I setup to make as perfect as I could.
Then I tried Zed. Everyone said Vim motions were smooth, and they weren’t lying. After a few days of tweaking settings, I went all in. Been using it exclusively for ~2 weeks now. No regrets.
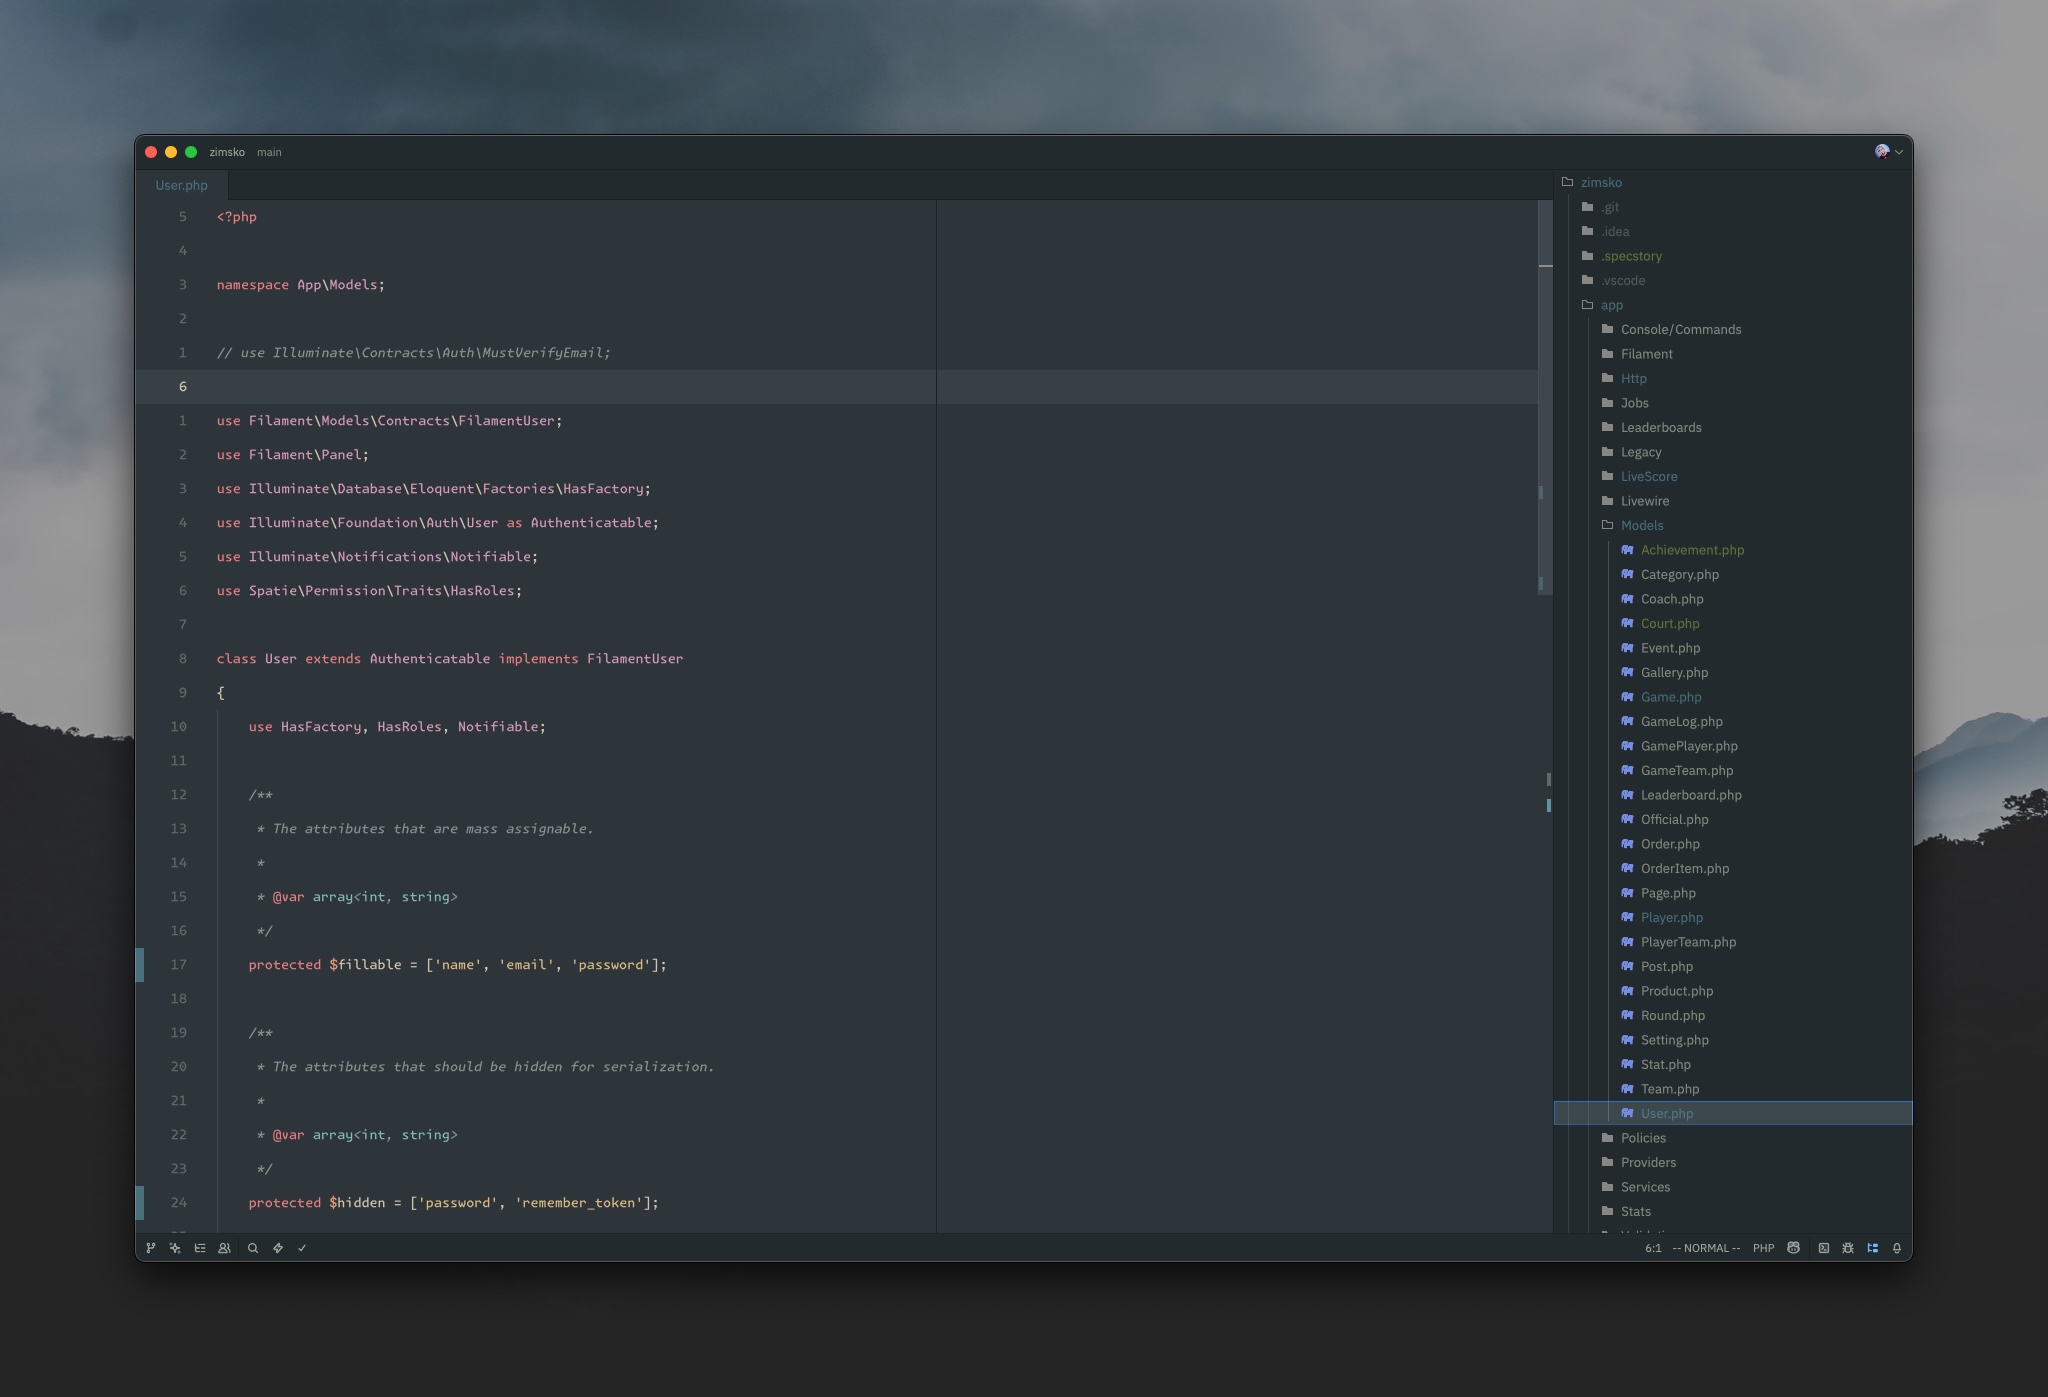
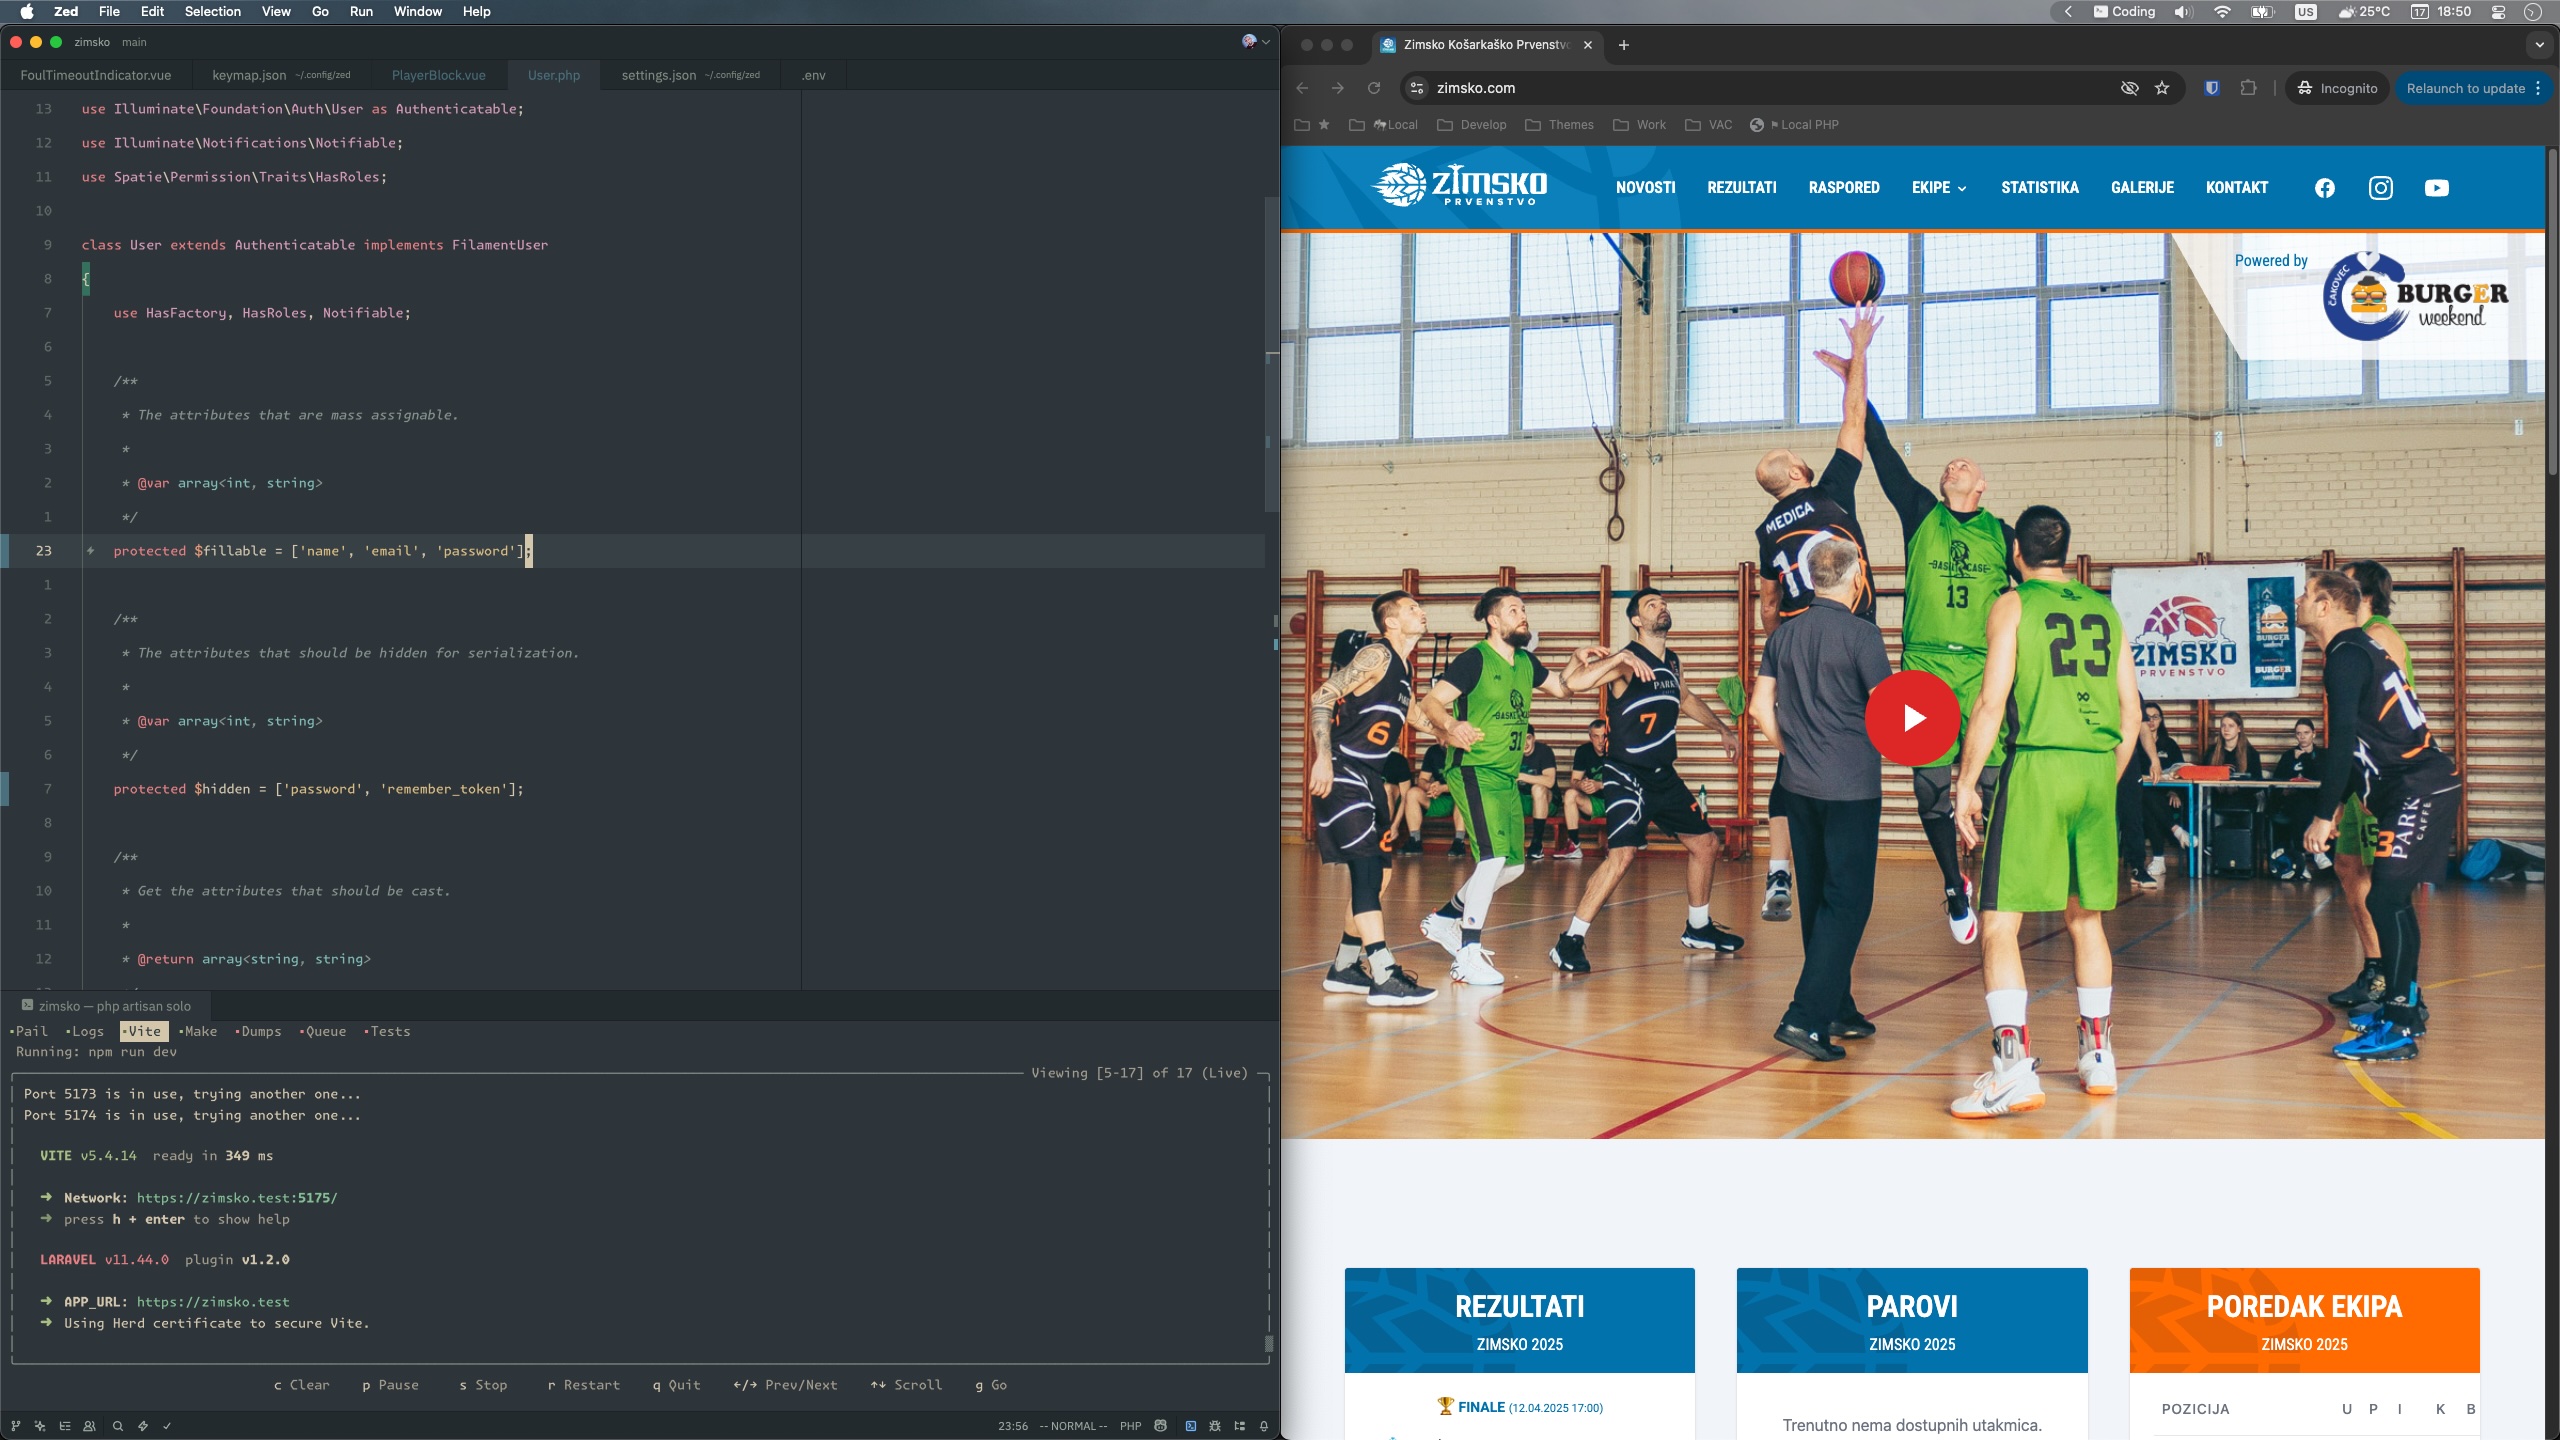
Settings
First of all, let's go over some settings I feel are a must (my preference). The I currently use is Everforest, the font is MonaspiceKr Nerd Font" and the icon theme is the Bearded Icon Theme.
I keep the project tree on the right, git panel + AI chat on the left. Autosuggest is hidden unless I summon it with a shortcut (otherwise it just gets annoying).
Full settings: settings.json
PHP LSP Settings
I run phpactor and phptools, plus PHPStan on Laravel projects. Setup is dead simple—enable LSPs and you’re good.
Dotfiles here if you’re curious: dotfiles
Laravel specific
Since Laravel Boost came out just recently, I haven't had that much time to play around with it, but I did manage to set it up in Zed, and it's pretty simple.
Just install it first:
composer require laravel/boost --dev
php artisan boost:install
Pick all the editors you want. Since I currently have Copilot enabled, that the one I need.
Then in Zed, open up the agent panel (leader a for me 😉), and open up the settings to add a custom server. The config should look something like this:
{
  "laravel-boost": {
    "command": "php",
    "args": ["artisan","boost:mcp"],
    "env": {}
  }
}
Snippets
Haven’t ported them all yet, but my most-used snippets are here:
snippets
Keymap and bindings
This is where things get serious. Or, as serious as one can get while arguing about which key should be pressed to escape INSERT mode.
Step one: enable Vim mode in Zed. Congrats, you’re already halfway to being cooler than everyone else in your office.
If you’ve never tried Vim motions—do it. You’ll hate it at first, then suddenly one day your fingers will be flying like you’ve unlocked a cheat code. If you did try them before and didn’t like them… sorry, but you were wrong 😉
Learning the basics is easy: there are endless tutorials, a VS Code extension with training built in, and even games online to practice. (Yes, typing games for developers exist, and no, they won’t improve your WPM on Tinder.)
Now, let’s talk about the leader key. Think of it as a “what I really meant was…” key. In Vim, it’s a special prefix that makes your custom shortcuts possible. I bound mine to the spacebar—because hey, it’s the biggest, easiest-to-hit key on the keyboard. Might as well put it to work.
Full keymap lives here: keymap.json
But let’s go through some of the most useful bindings I’ve added on top of Zed’s defaults.
Favorite and most used bindings
Again, to fully understand the keybinds, you need to understand that vim has multiple modes, the 3 most ones are NORMAL, INSERT and VISUAL, so we define out keybindigs in a conxets regarding which mode we are in.
Eg. when I wanna search for files in a project, I press leader leaders, meaning space 2 times. It's basically the same as cmd+p in VS Code.
Here are some of the bindings I have setup with my leader key:
{
    "context": "Editor && vim_mode == normal && vim_operator == none && !VimWaiting",
    "bindings": {
        "space space": "file_finder::Toggle",
        "space e": "project_panel::ToggleFocus", // Focu on the file tree
    	"space /": "pane::DeploySearch",
      	"space p": "command_palette::Toggle", // All commands, same as :
        "space r": "outline::Toggle", // Show list of functions, variables...
        "space o": "pane::CloseOtherItems",
        "space s": "pane::SplitRight",
        "space S": "pane::SplitDown",
        "space tab": "tab_switcher::Toggle", // Show open tabs
        "space d": "diagnostics::Deploy", // Show all errors
        "space g": "git_panel::ToggleFocus",
        "space a": "agent::ToggleFocus", // AI agent
    }
}
All of these work in NORMAL mode. Pretty self-explanatory once you start using them.
Now, escaping INSERT mode with the esc key is… fine. But it’s way over there, like the keyboard’s no-man’s-land. Instead, I mapped jj and jk to exit INSERT mode. My pinky thanks me every day.
{
    "context": "Editor && vim_mode == insert",
    "bindings": {
      "j k": "vim::NormalBefore",
      "j j": "vim::NormalBefore",
    }
},
For code navigation, I’ve got this setup (basically, hit g for “go”):
{
    "context": "Editor && vim_mode == normal && vim_operator == none && !VimWaiting",
    "bindings": {
        "g d": "editor::GoToDefinition",
        "g D": "editor::GoToDefinitionSplit",
        "g i": "editor::GoToImplementation",
        "g I": "editor::GoToImplementationSplit",
        "g t": "editor::GoToTypeDefinition",
        "g T": "editor::GoToTypeDefinitionSplit",
        "g r": "editor::FindAllReferences"
    }
}
I also keep some global shortcuts that work in any mode, like project switching and toggling docks:
{
    "context": "Workspace",
    "bindings": {
        "alt-cmd-p": ["projects::OpenRecent", { "create_new_window": false }],
        "cmd-1": "workspace::ToggleRightDock",
        "cmd-2": "workspace::ToggleLeftDock",
        "cmd-3": "workspace::ToggleBottomDock",
        "cmd-r": "outline::Toggle"
    }
},
Eh, pressing alt-cmd-p show my recent projects. Thats how I switch between various projects. Actually this works so fast that it doesn't even make sent to have multiple windows open.
I mentioned before I have the AI auto suggestions disabled, and I use a keyboard shortcut. This looks something like this:
{
    "context": "Editor && vim_mode == insert",
    "bindings": {
      "ctrl-x ctrl-z": "editor::ShowCompletions",
      "ctrl-x ctrl-c": "assistant::InlineAssist",
      "ctrl-x ctrl-x": "editor::ShowEditPrediction",
    }
},
Also I have leader e defined to switch between the editor and the file tree, so when focused on the file tree I need a way to do some file management, so I set this up like so:
{
    "context": "ProjectPanel && not_editing",
    "bindings": {
      "a": "project_panel::NewFile",
      "A": "project_panel::NewDirectory",
      "p": "project_panel::Paste",
      "x": "project_panel::Cut",
      "s": "project_panel::Open",
      "c": "project_panel::Copy",
      "r": "project_panel::Rename",
      "d": "project_panel::Trash",
    }
}
This means when navigating through the file tree, you can simply press a single key and do the required action.
Finally, tab switching. Because yes, I’m still figuring out whether I prefer the Vim-style H/L navigation or just smashing tab/shift-tab like a gamer changing weapons:
{
    "context": "Editor && vim_mode == normal && vim_operator == none && !VimWaiting",
    "bindings": {
        "tab": "pane::ActivateNextItem",
        "shift-tab": "pane::ActivatePreviousItem",
        "H": "pane::ActivatePreviousItem",
        "L": "pane::ActivateNextItem",
    }
}
Still experimenting, but either way, it beats reaching for the mouse like some kind of animal.
And before we wrap up, here are a couple more handy bindings from my config.
For example, moving lines around while in VISUAL mode (because yes, sometimes you just want that code to scoot up or down a bit):
{
  "context": "Editor && vim_mode == visual && !VimWaiting && !menu",
  "bindings": {
    "shift-K": "editor::MoveLineUp",
    "shift-J": "editor::MoveLineDown",
    "shift-up": "editor::MoveLineUp",
    "shift-down": "editor::MoveLineDown"
  }
}
Or opening Markdown previews—because if you’re writing docs or blog posts like this one, it’s nice to know your headers aren’t secretly plotting against you:
{
  "context": "Editor && (vim_mode == normal || vim_mode == visual) && vim_operator == none && !VimWaiting",
  "bindings": {
    "space m p": "markdown::OpenPreview",
    "space m P": "markdown::OpenPreviewToTheSide"
  }
}
Outro
And that’s a wrap! 🎁
That’s my setup (for now). I’ll probably tinker with it again next week—because let’s be honest, a developer’s config is never really done. If I do, I’ll update this article and make a note at the top so you don’t miss it.
Until then—cheers, and may your caps lock key also find its true purpose ✦